Swagger는 API명세 문서를 작성하는데 도움을 주는 도구이다.
https://app.swaggerhub.com/home
Build, Collaborate & Integrate APIs | SwaggerHub
app.swaggerhub.com
여기서 회원가입 후, create버튼을 눌러 새 문서를 작성할 수 있다.

템플릿 없이 문서를 생성하면 이런 기본 창이 뜬다.
https://jsonplaceholder.typicode.com/
JSONPlaceholder - Free Fake REST API
{JSON} Placeholder Free fake API for testing and prototyping. Powered by JSON Server + LowDB. Tested with XV. Serving ~2 billion requests each month.
jsonplaceholder.typicode.com
예시로 사용할 REST API

https://jsonplaceholder.typicode.com/todos/{id} 로 get요청을 하면 데이터를 보내준다.
이것의 명세를 작성해보자.
openapi: 3.0.0
info:
  version: 1.0.0
  title: API_example1
  description: example1

servers:
  # Added by API Auto Mocking Plugin
  - description: SwaggerHub API Auto Mocking
    url: https://virtserver.swaggerhub.com/YDH7219/API_example1/1.0.0
  - description: JSON Placeholder API
    url: https://jsonplaceholder.typicode.com

paths:
  /todos/{id}:
    get:
      summary: Returns a user by ID
      parameters:
        - name: id
          in: path
          required: true
          description: The ID of the user to return
          schema:
            type: integer
      responses:
        '200':
          description: OK
          content:
            application/json:
              schema:
                type: object
                properties:
                  userId:
                    type: integer
                  id:
                    type: integer
                  title:
                    type: string
                  completed:
                    type: boolean
(최종 코드)
하나씩 살펴보자.
 servers:
 ...
  - description: JSON Placeholder API
    url: https://jsonplaceholder.typicode.com
서버 설명과 url을 적어준다.
paths:
  /todos/{id}: # 경로가 /todos/{id}임
    get: # GET 메서드에
      summary: Returns a user by ID # 요약: 해당 ID에 해당하는 사용자를 반환합니다.
      parameters: # 파라미터: 요청에 사용되는 파라미터 목록
        - name: id # 파라미터명: id 파라미터에 대한 설명
          in: path # in: 파라미터가 경로에 있음
          required: true # 필수 파라미터인지 여부를 나타냅니다.
          description: The ID of the user to return # 설명: 반환할 사용자의 ID입니다.
          schema:
            type: integer # 스키마: 파라미터의 데이터 유형입니다. 여기서는 정수형입니다.
      responses: # 응답: API의 응답 목록입니다.
        '200': # 상태 코드: 200에 대한 설명입니다.
          description: OK # 설명: 상태 코드 200에 대한 설명입니다. 여기서는 OK로 표시됩니다.
          content: # 컨텐츠: 응답의 컨텐츠에 대한 설명입니다.
            application/json: # JSON 형식의 컨텐츠에 대한 설명입니다.
              schema: # 스키마: JSON 응답의 스키마에 대한 설명입니다.
                type: object # 스키마의 데이터 유형이 객체임을 나타냅니다.
                properties: # 프로퍼티: 객체의 속성 목록입니다.
                  userId: # 속성: userId에 대한 설명입니다.
                    type: integer # 데이터 유형은 정수형입니다.
                  id: # 속성: id에 대한 설명입니다.
                    type: integer # 데이터 유형은 정수형입니다.
                  title: # 속성: title에 대한 설명입니다.
                    type: string # 데이터 유형은 문자열입니다.
                  completed: # 속성: completed에 대한 설명입니다.
                    type: boolean # 데이터 유형은 불리언(참 또는 거짓)입니다.
추가적으로,
SpringBoot에 swagger를 연동할 수 있다.
//swagger
	implementation 'org.springdoc:springdoc-openapi-starter-webmvc-ui:2.0.2'
gradle파일에 위의 의존성을 추가하면 끝이다.

앱을 실행하고 http://localhost:8080/swagger-ui/index.html#에 접속하면 API문서를 볼 수 있다.
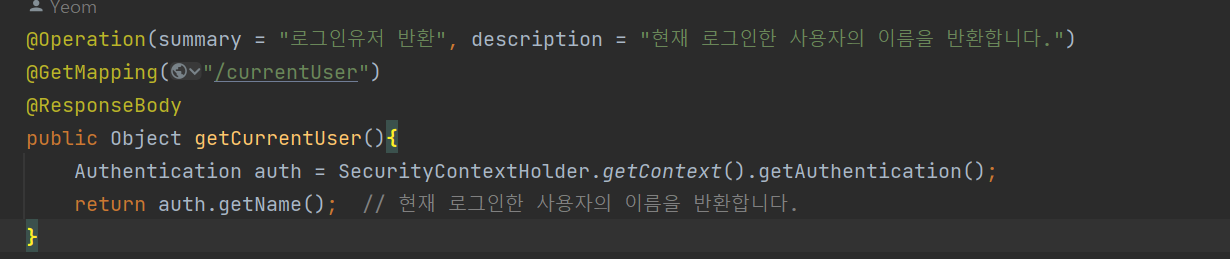
(메소드에 설명을 적고싶다면 @Operation을 이용하자)

swagger에서 execute를 눌러 실행해볼수도 있다. 잘 작동된다.
'웹개발 > SpringBoot' 카테고리의 다른 글
| 검색 기능 적용하기 (0) | 2023.07.26 |
|---|---|
| 페이징 기능 적용하기 (0) | 2023.07.26 |
| MySQL 설치 및 Spring 연동 방법 (0) | 2023.06.09 |
| 로그인 여부에 따라 바뀌는 로그인/로그아웃 버튼 만들기 (0) | 2023.05.27 |
| @RequestBody를 적어야 됐던 일 (1) | 2023.05.18 |


댓글